Is Art Paste Supposed to Have Lumps in It
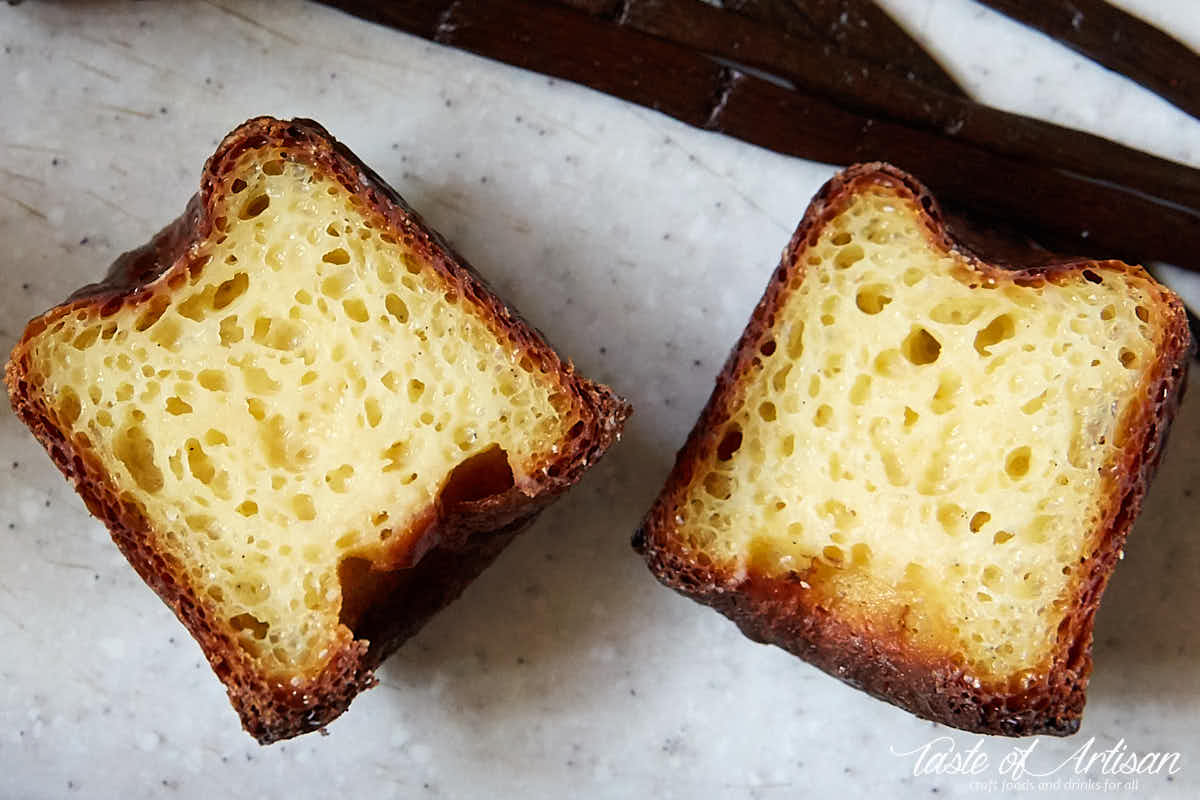
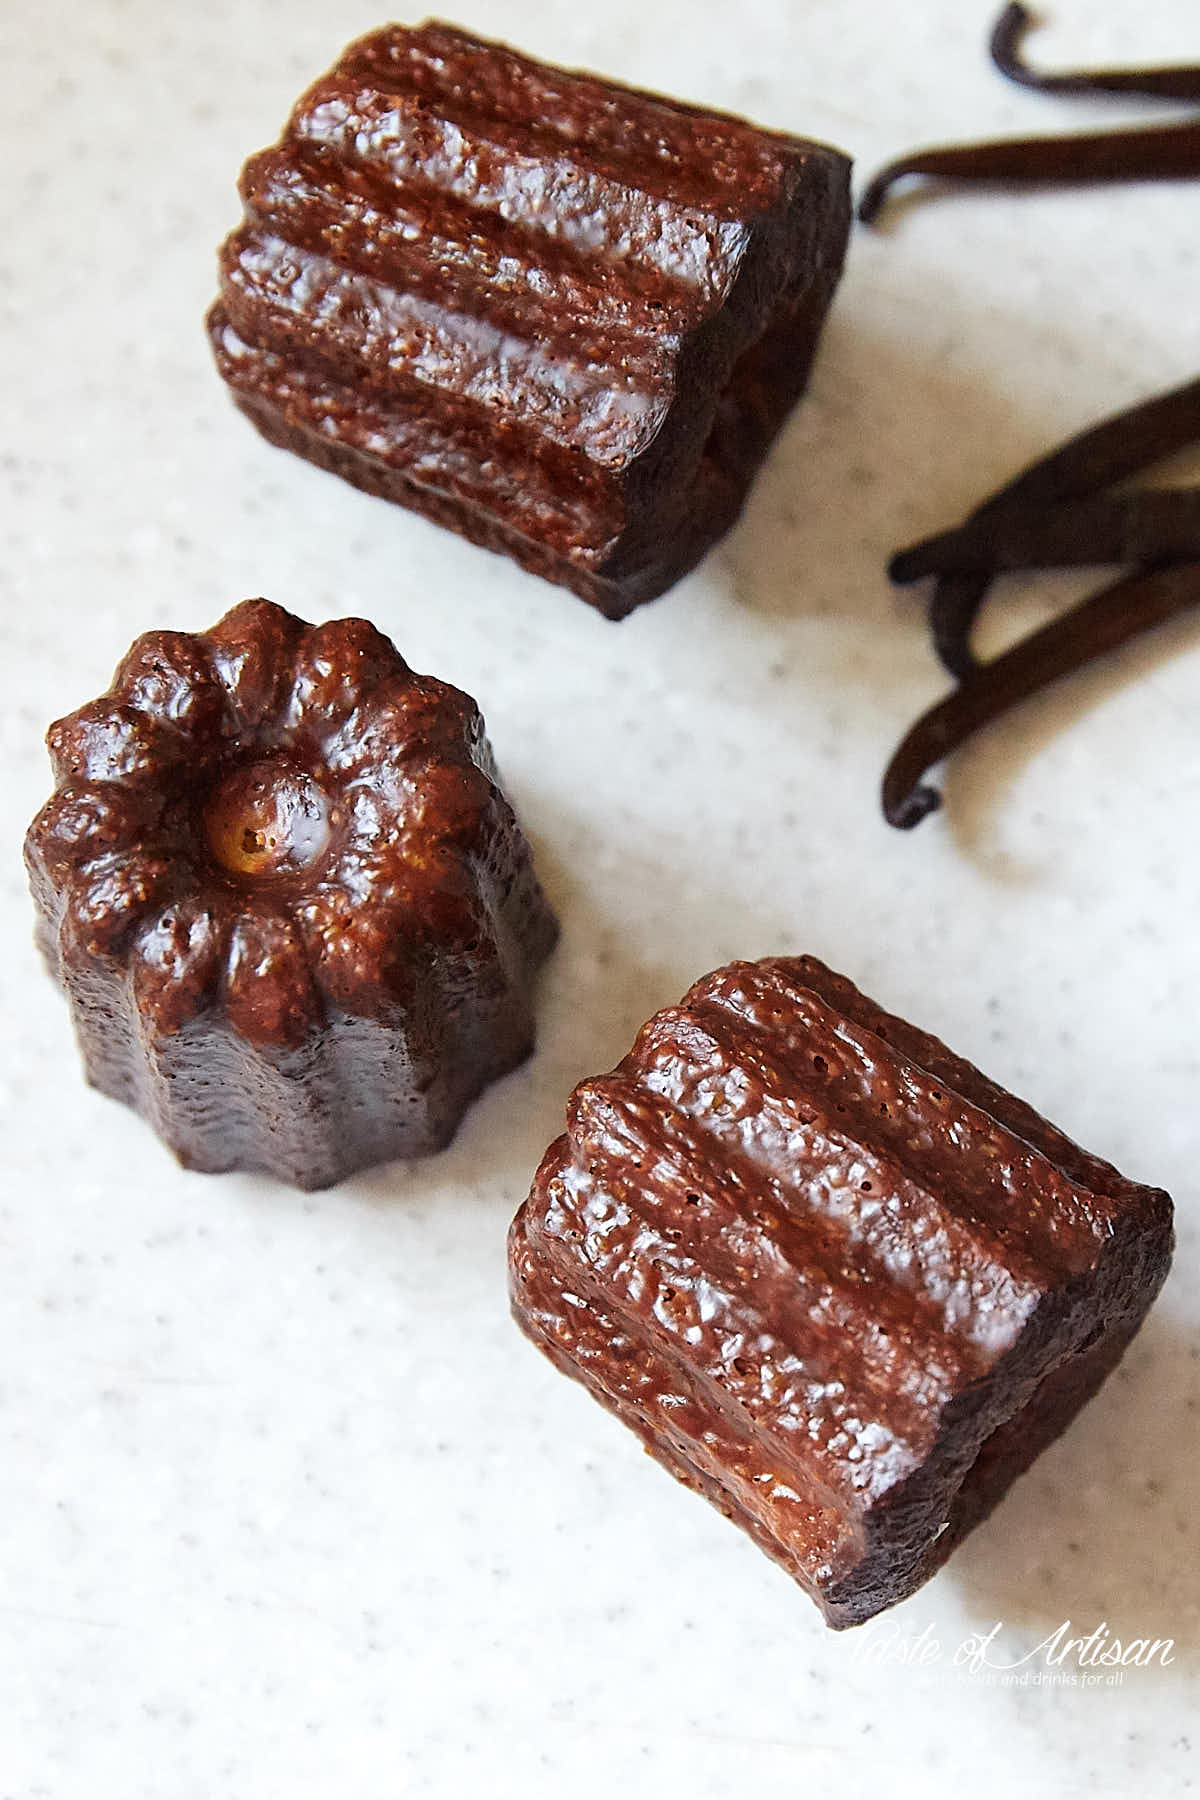
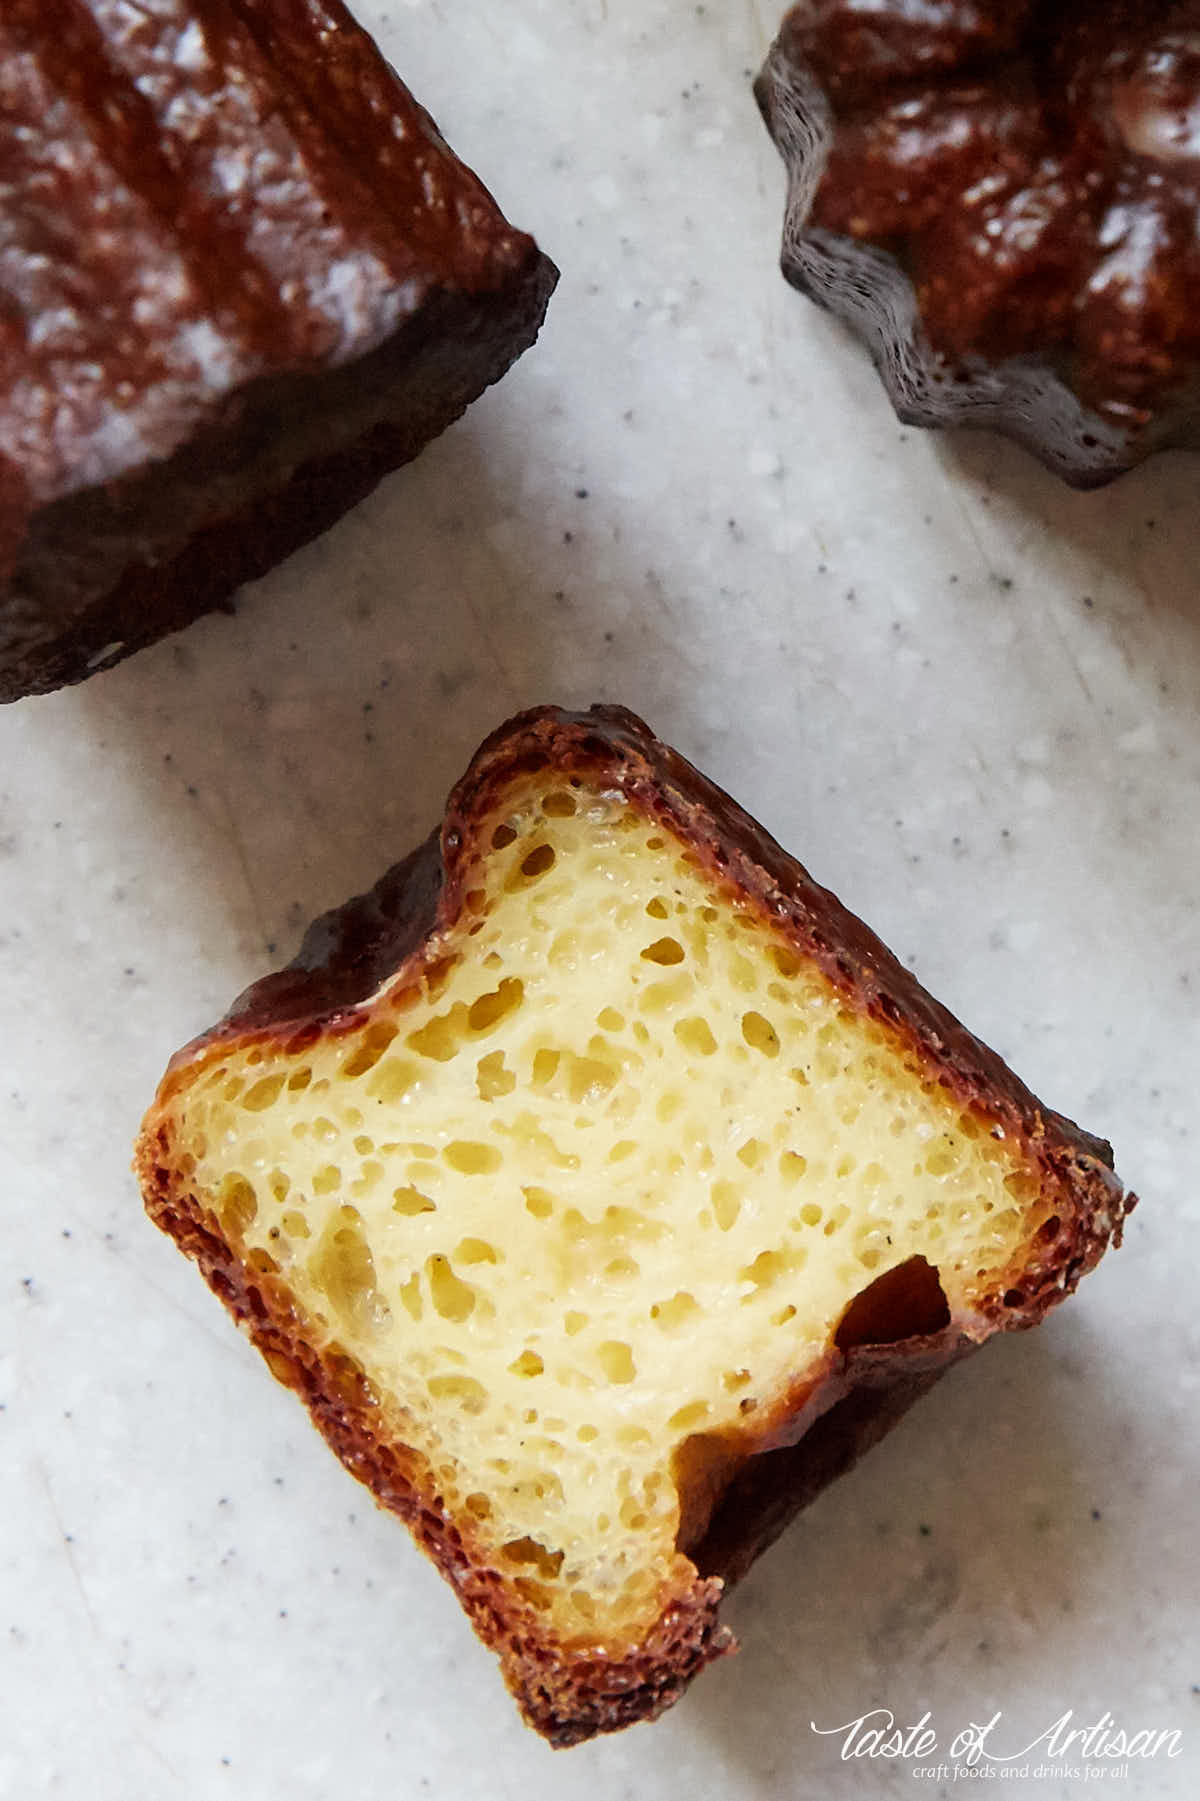
I had never tried a French pastry called canele (canelé) until only just a couple of months ago, and I realized that I'd been missing out big time. These little morsels are nothing like anything else I've ever tried. Rich, moist and custardy interior is sealed into a thin, crispy, caramelized shell. As you bite into them you there is a distinct crackling sound, and then your teeth sink into soft, sweet and custardy goodness. They are as beautiful to look at as they are delicious to eat.
I have to tell yous though, making canele proved to be i of the biggest culinary challenges I'd ever faced. I went through one canele recipe after another, making a dozen batches before I got the results that I would consider decent.
As I read various recipes and instructions on the Internet I concluded that it'southward not the canele recipe that makes a great canele, it'due south the process. Most canele recipes are fairly similar, to the point where they look practically identical. What differs is how yous mix the ingredients and how you bake your caneles. I am convinced that the baking temperature was the biggest success cistron for me.
The canele recipe that I posted below evolved from a few recipes that I came across during my quest - books, forums posts and blogs. It works perfectly for me.
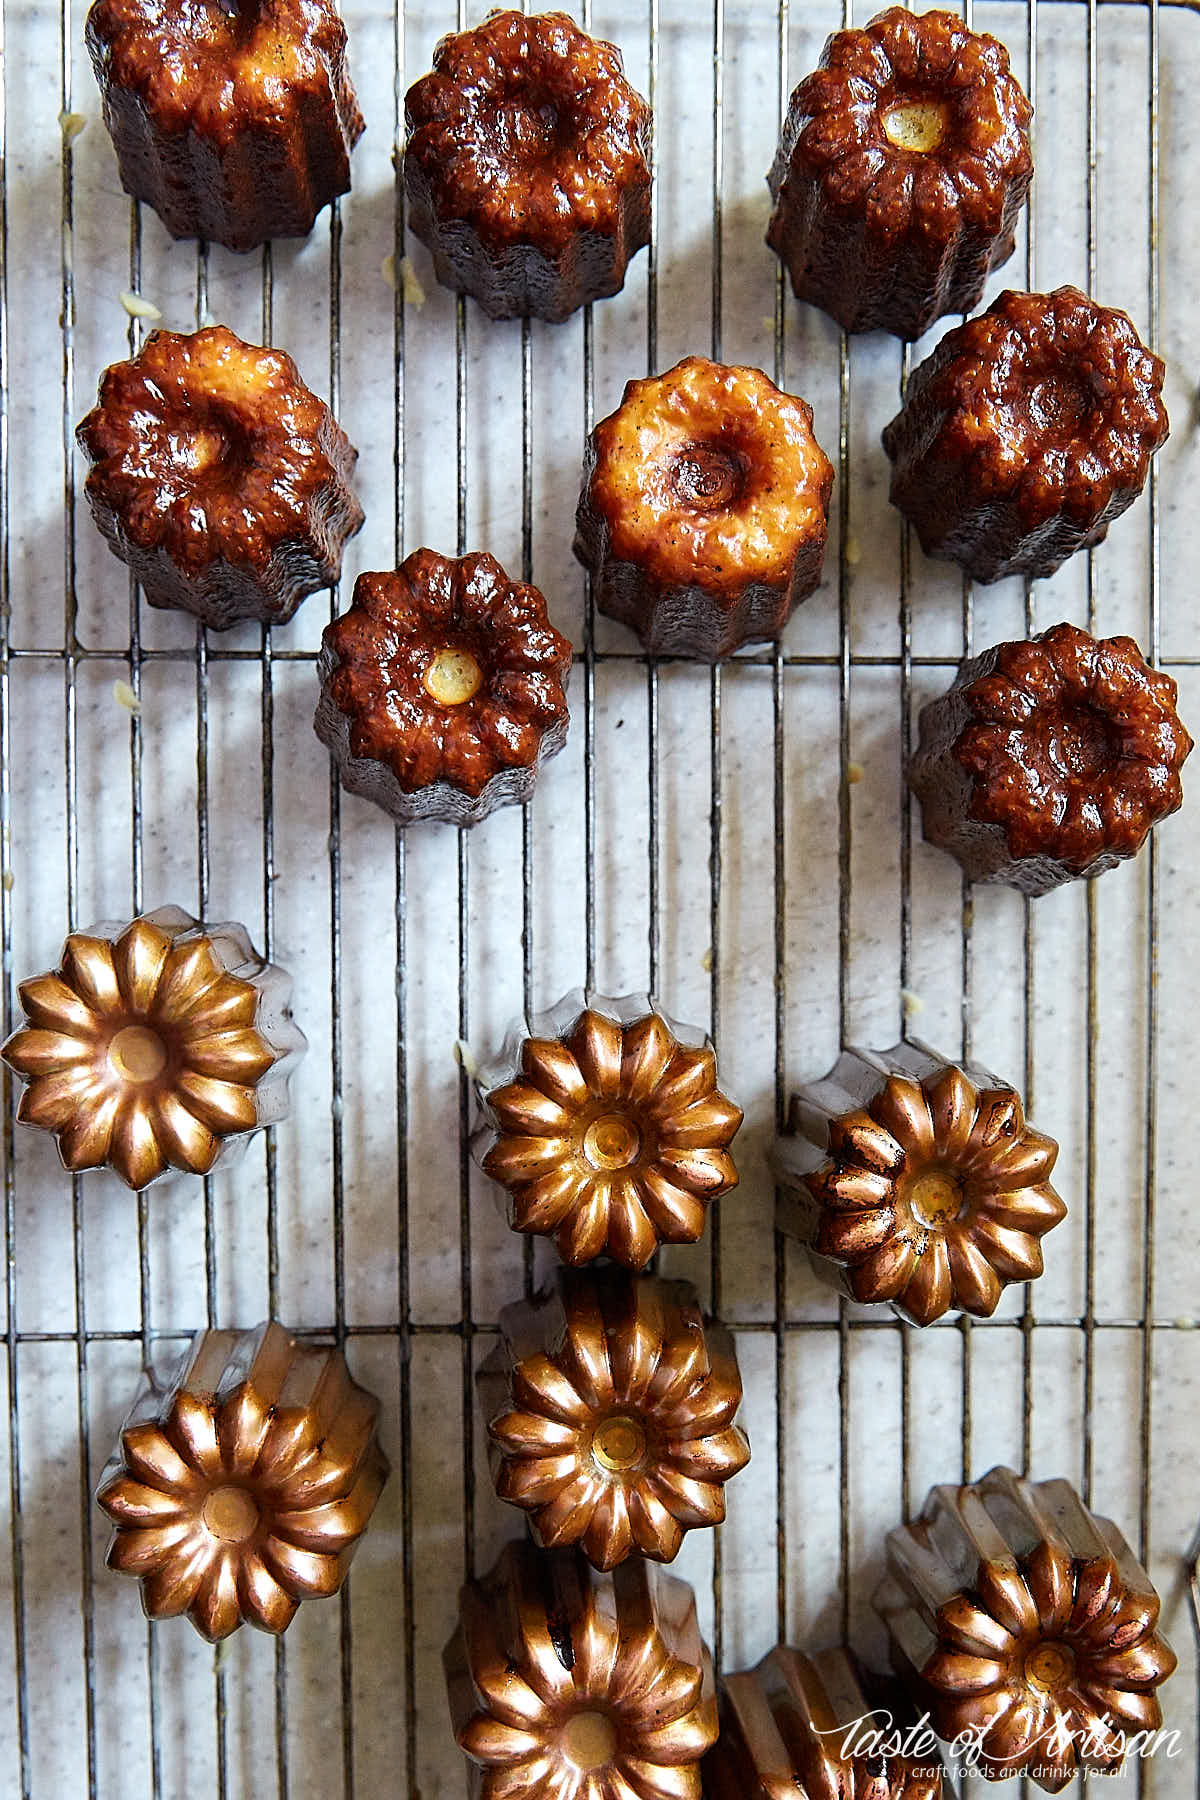
Going for canele authenticity - using copper molds
From the get-become I decided to go for authenticity and the best possible results. This meant not wasting any coin on silicone and aluminum molds and immediately going for the existent deal - the copper canele molds. Pierre Hermé himself suggested that it is imperative to use copper molds, which ensure the ideal cooking. And who wants to settle for less than ideal?
Update on copper tin-lined canele molds - June 23, 2016
I read through various reviews and ended upwardly buying 8 ii-inch Matfer Bourgeat canele molds. They cost me a modest fortune only I admittedly love them. Mauviel M'Passion canele molds are very similar. Both brands are very pop and make first-class quality canele molds, and then I would go with the cheaper ones you lot can find.
These molds are past no means inexpensive, they typically sell for about $20-25 a piece. However, I noticed that recently Amazon started having some really practiced deals on these, such as this i:
This is half the price per mold than what I paid when I purchased my first 8 canele molds. These are neither Matfer nor Mauviel but they await like the real deal. Here is what I think: I recently got additional 12 canele molds that came from Bordeaux, France. They were no-brand, generic tin can-lined copper molds from Bordeaux, but they look identical to the 8 Matfer molds I got hither. The molds in the link above are too said to have come from Bordeaux and look very much similar mine.
Coating canele molds with beeswax and butter mix
To go beautiful, shiny exterior you lot absolutely must use beeswax and butter mix to coat the inside of the molds. Yous may want to go with organic beeswax, merely I went with regular one due to significant price difference. You lot tin get it from whatsoever wellness food store or on Amazon. In whatever case, y'all want pure beeswax, with no additives, like the one below.
I tried both with and without, and the decision was a no-brainer for me - canele with butter and beeswax mix had that lively, glossy sheen that made them much more flavory and elegant. Typical ratio used is 50/50, only I establish i recipe on a French forum that recommended 3/2 butter to beeswax ratio. I tried it and similar the results amend - information technology produced less waxy and thinner coating.
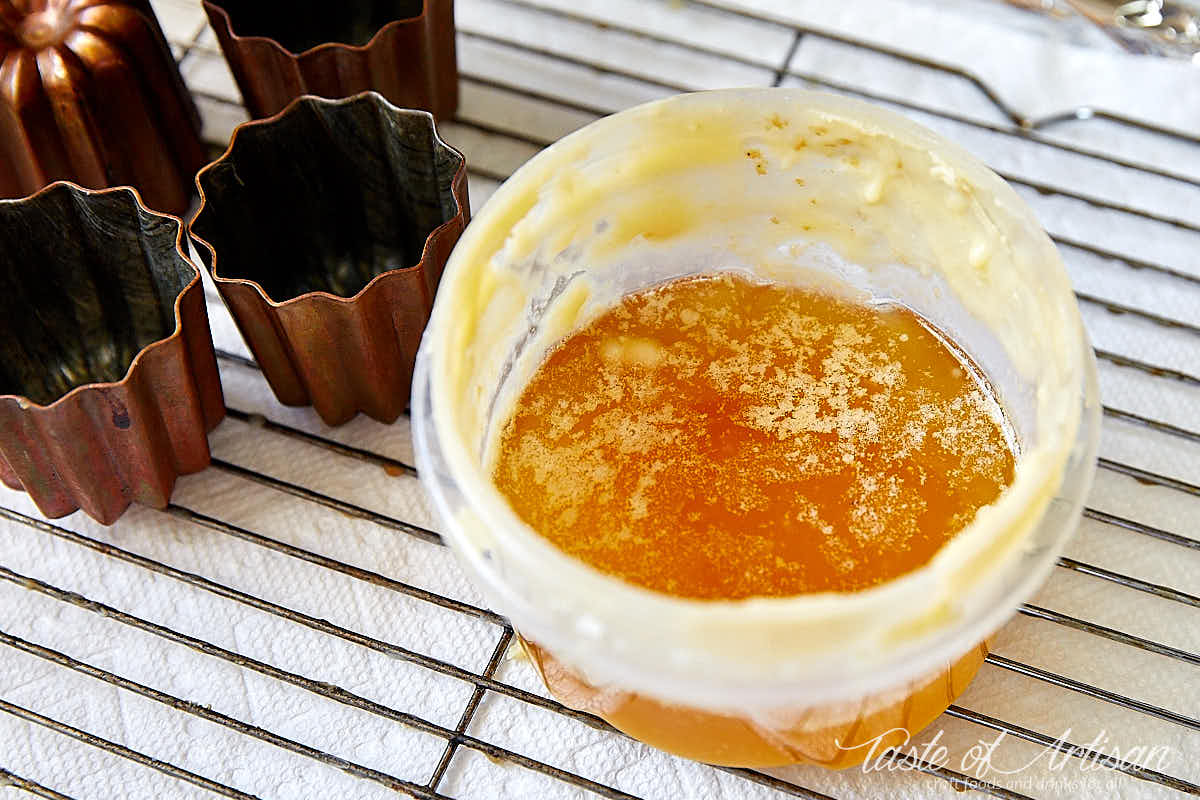
A uncomplicated and constructive way to use beeswax to molds
I've seen some very complicated methods for how to apply beeswax/butter mix to the molds, but through experimentation I realized it was not necessary. My very simple method involves heating beeswax and butter in a microwave until liquid, then pouring the mix into molds and immediately pouring back to the original container. This fashion I get full coverage and a very thin and even glaze throughout.
Brushing turned out a bad idea as the wax hardens rapidly on the brush resulting in pure mess. Cleaning the brush after was something else as well. I mean, you could preheat the molds and so castor, it would probably work too, but that'south just another actress pace and you have to target the proper temperature, and habiliment mittens. Who wants that? And y'all demand to clean the brush anyway.
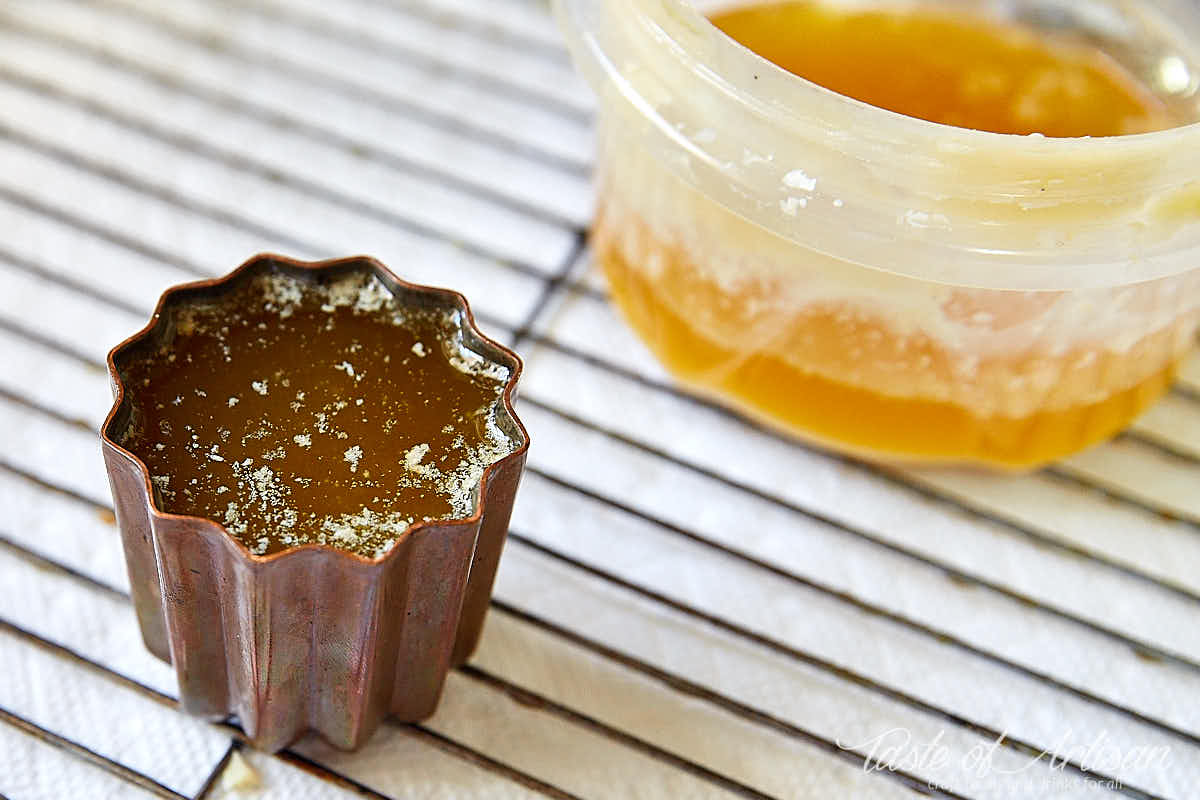
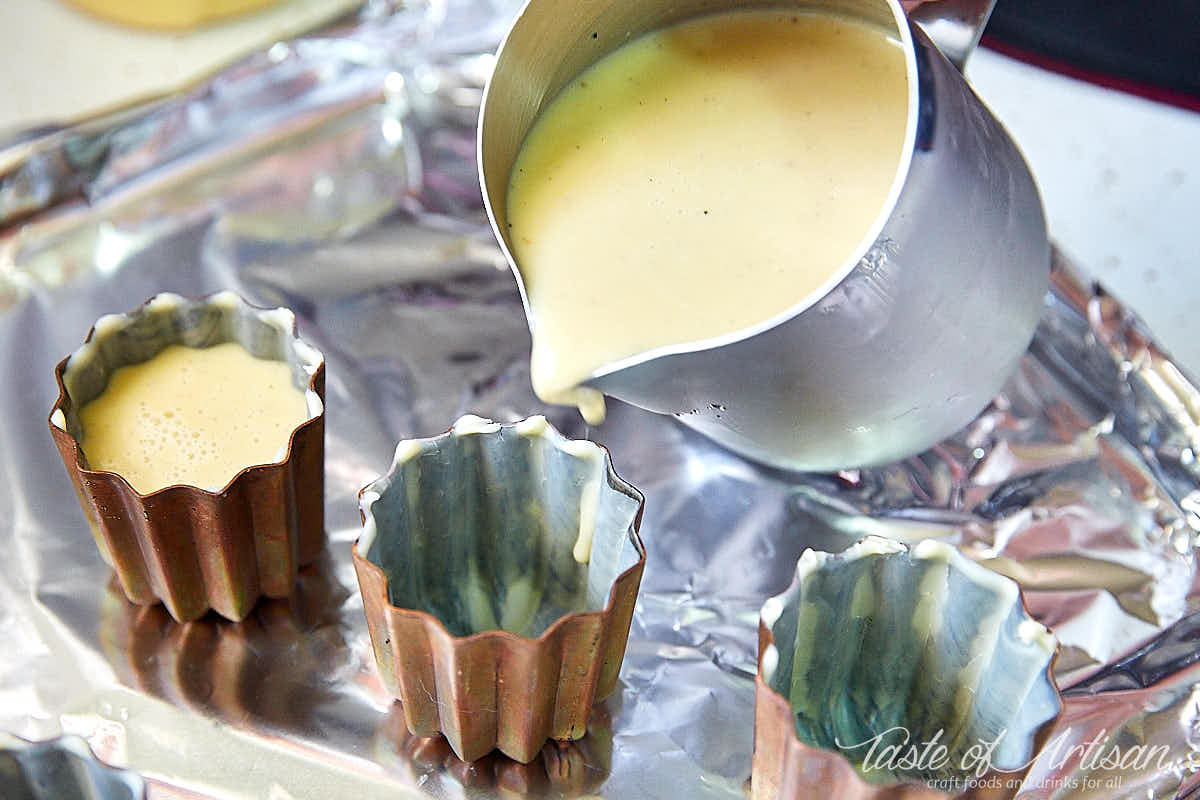
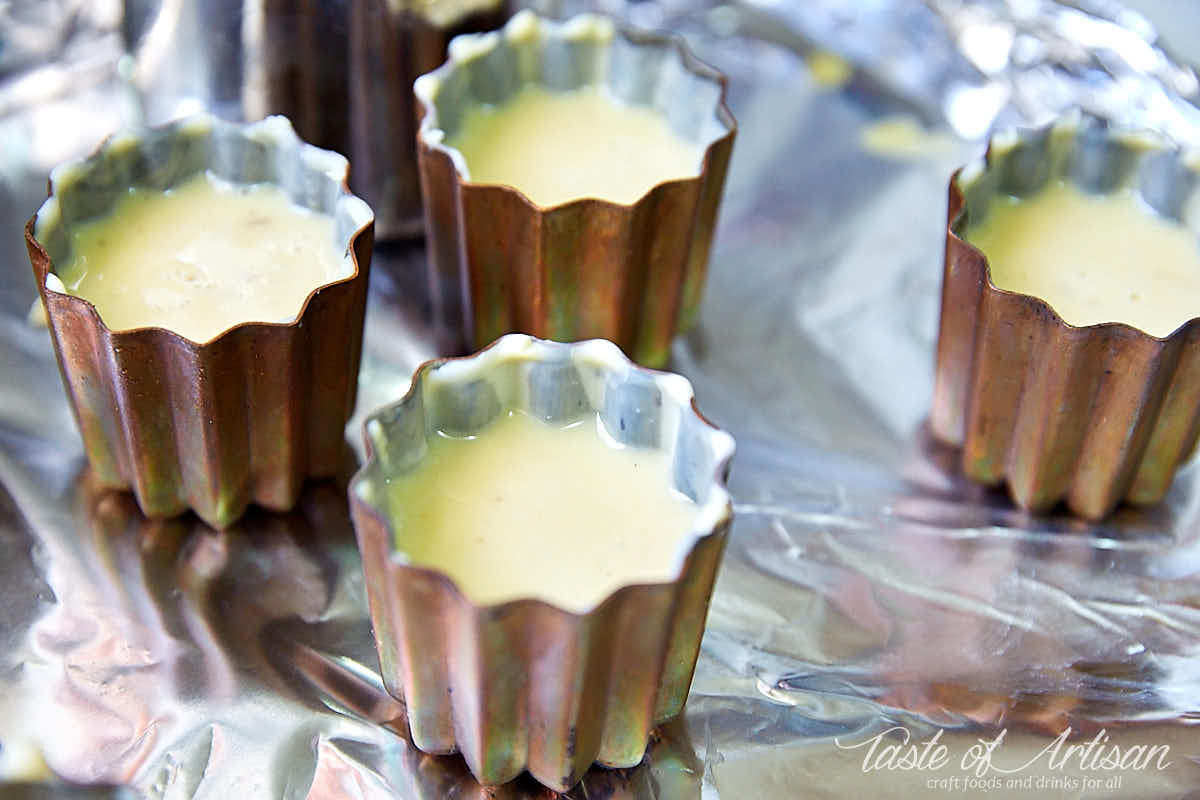
After pouring the mix back, I placed the molds upside down on a cooling rack with paper towels underneath to let excess baste down.I would then chill the molds in a freezer for almost 10 minutes, fill up them with batter to virtually iii/8 inch from the peak.
The problem of canele 'mushrooming'
My biggest challenge in the way of getting a decent caneles was that they would rise out out of the molds, grow a big mushroom head and never sink back in. They would look unsightly and grotesque. There would exist no beautiful sheen, and the bottoms would be white and under-cooked. A number of bloggers on the internet suggested that this puffing up was the issue of also much air being introduced during mixing of the batter. I tried no mixing at all, pushing all the ingredients through a sieve following suggestions, a very laborious and messy chore, merely the end upshot was all but the aforementioned. Then I also watched a few videos and some French bakers don't seem to intendance nigh air, vigorously whisking their batter abroad.
Possible solutions
Some authors suggest watching caneles closely for the showtime thirty minutes and taking them out of the oven as shortly every bit they start to rise of the molds and keeping them out until they would sink back in. Hm... I tried that, but it's too complicated and laborious for my liking. Frankly, it did non work also well either. Every bit presently every bit you put them back in, they would start rising again. Y'all demand to repeat this step multiple times to go them finally non to mushroom, and that was simply not for me. I wanted a perfect canelé without all that nonsense and trouble.
Another 'trick' I tried was to practise with the temperature. Some canele recipes suggested starting the bake at a higher temperature for the caneles to course a difficult surface which would preclude mushrooming. Some start at 450F, some at 500F. I tried both and information technology did not work for me. Still mushrooming like crazy and never sink dorsum in. Using convection function kind of worked, but tops turned out besides burnt.
The solution that resulted in a perfect canele
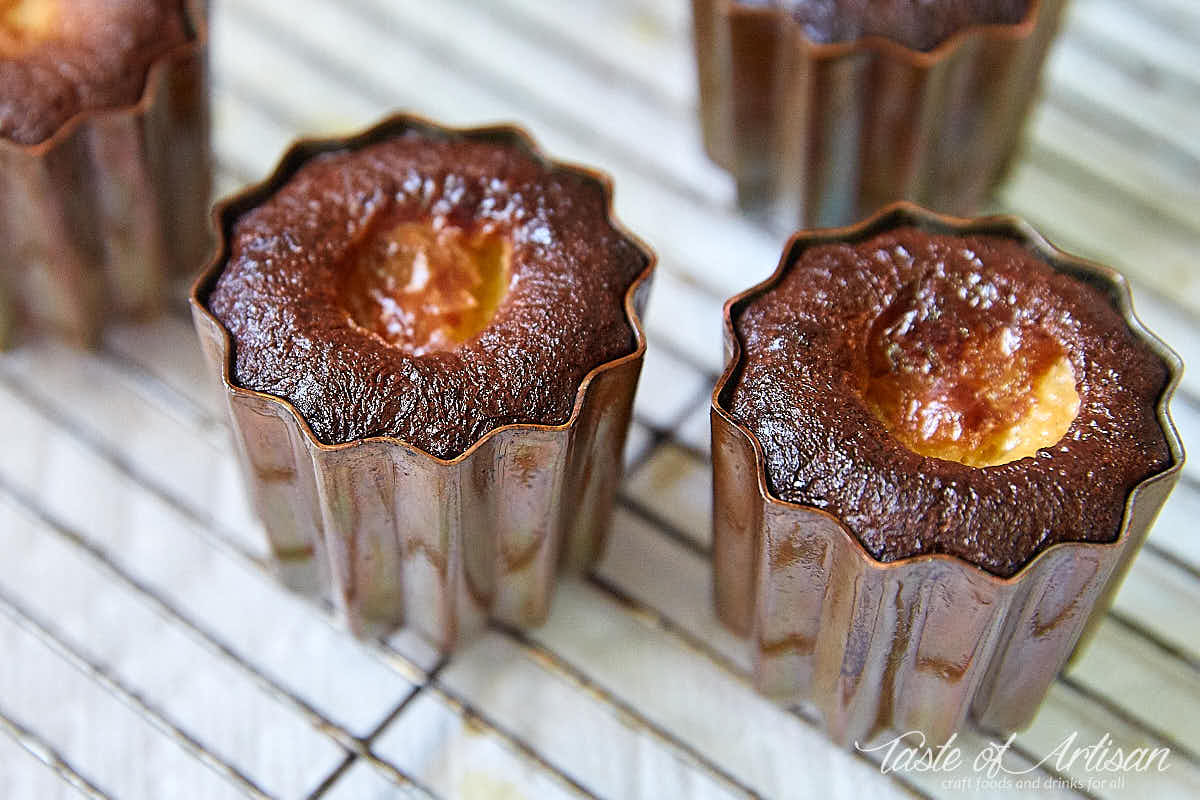
So, it finally all clicked into place. I visited a French forum (cheers Google for the 'translate' feature) and noticed that practically every canele recipe there calls for starting temperature of 270C to 290C, that's 520F to 550F. Some even go every bit loftier as 300C! Perhaps that was my trouble? That my oven wasn't hot enough for the outer shell to class quick plenty and prevent mushrooming? I pre-heated the oven to 550F and baked caneles at this temperature for 10 minutes. Below is what I saw - some rising but no crazy mushrooming. Even so. I turned the estrus down to 375F and permit caneles broil for another l minutes.
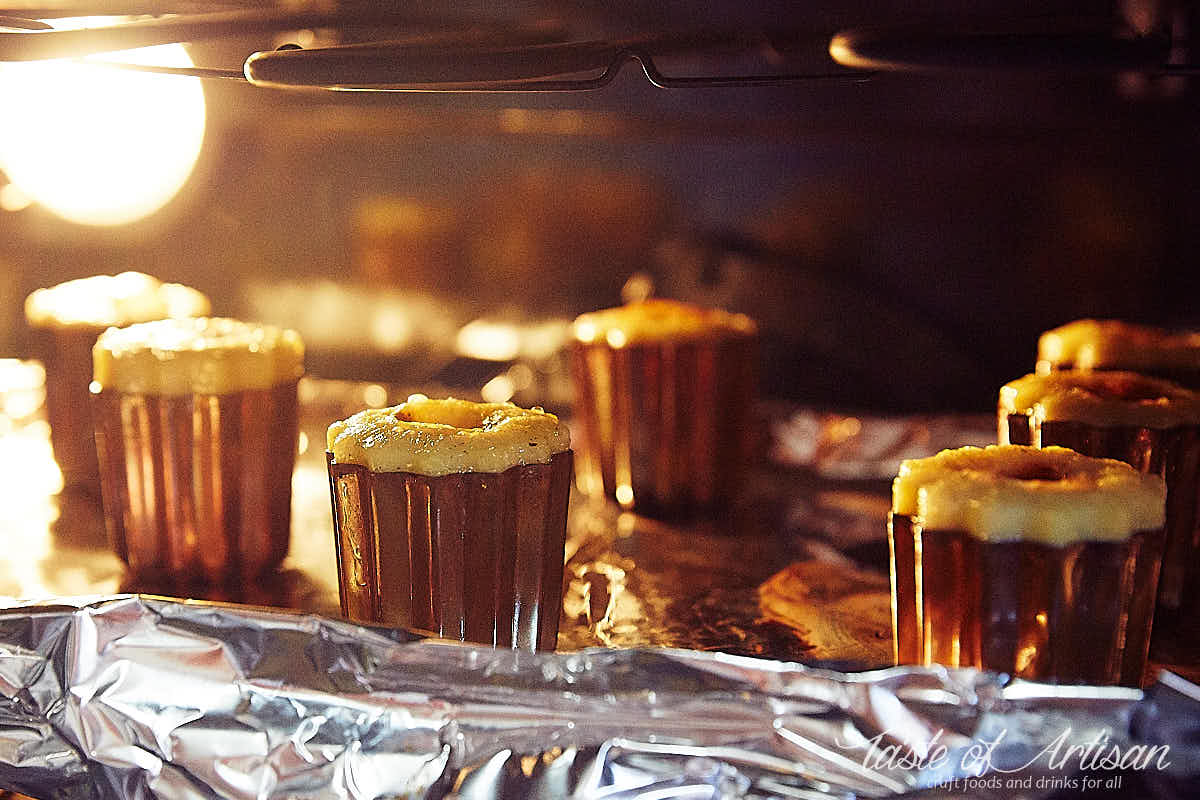
They came out perfect. Hooray!!! Finally!!! I did it!!! They sank back in and came out exactly how I wanted them.
Occasional 'white butt' problem
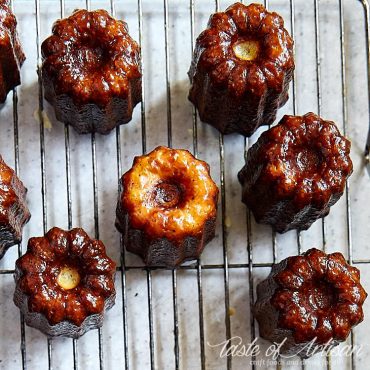
I tried the method described higher up several times afterwards and it worked perfectly well every time. At the very least, it works with my oven. Sometimes one or two little buggers don't sink back in all the way and you get what French call the 'white butt' problem - caneles that come up out with white bottoms. Yous can see a couple of those on the picture beneath.

It seems that it happens when y'all fill the molds a tad also much causing caneles to aggrandize at the acme during earlier baking stages which prevents them from dropping all they way back downward and touch the bottom of the mold at a later stage. How much is a fiddling besides much? It's more than what you come across on the moving-picture show below.
- 2 vanilla beans (preferably Madagascan)
- 500 ml milk (cold)
- 200 thousand cane carbohydrate (250 g if you desire more sweet following traditional recipes; I utilise 200 one thousand)
- 100 yard all-purpose flour (you tin can also utilise bread flour)
- 50 k butter (melted)
- two eggs (large)
- 2 egg yolks
- four Tbsp nighttime rum
For the mold blanket:
- 40 g beeswax
- 60 g butter
-
Pierre Hermé recommends that before you utilise your copper canele molds for the first fourth dimension, make clean them, and so flavor them by coating them with butter and placing them for xx minutes in a hot oven - 250° C (500° F) or more. Remove them from the oven, clean them with a paper towel while they're still hot, and allow them to cool earlier using. Never wash the molds, only wipe with a dry cloth or a newspaper towel later on each use.
-
Slit the vanilla beans lengthwise, and scrape the seeds from them with a pocket-size knife. Put the seeds, vanilla pods, and milk in a saucepan and bring them to a gentle simmer, and then turn off the estrus and let sit for 2 minutes.
-
In a split up bowl, whisk saccharide, eggs and egg yolks. Add together melted butter and whisk more until combined.
-
Remove the pods from the milk. Add i/four of the hot milk into egg mixture and mix well. Add flour and go on mixing until combined. Then slowly add the remaining milk while standing to mix until all ingredients are mixed well. Add rum and mix. This manner y'all volition avoid lumps and will end up with the perfect consistency of the batter. (Note: this footstep is very of import. Adding hot milk to egg mixture will temper the eggs and create custard which will ensure perfect consistency of your caneles).
-
Air-condition for 24 to 48 hours. This is non-negotiable. The texture and flavour improves dramatically by the second day and third solar day. So, 24 hour rest is mandatory. 48 hours if you want amazing canele. The concoction may be kept in a refrigerator for up to 4 days. Each time you use the batter, stir information technology well and work information technology at least 2 minutes with a whisk.
-
For a polish, shiny surface that accentuates the dark dark-brown colour of the caneles glaze the molds with a mix of 40 g beeswax and lx 1000 butter melted together. For this, melt the beeswax and butter together, speedily pour the mix into a mold and then back out into the original container. Plow upside down on a cooling rack with paper towel underneath to catch drippings. Once cooled downwardly, chill in a freezer or a fridge until fix to bake.
-
Preheat oven to 550F. Fill the molds with concoction to three/eight inch (ane cm) from the top. Place on a foil lined backing sail and bake the caneles at 550F for x minutes. Without opening the oven, driblet the temperature to 375F and continue blistering for another 45-50 minutes. Every oven is dissimilar, then your baking times may need to be adjusted.
-
Remove caneles from the oven. Rapidly remove caneles from the molds and place on a cooling rack upside down. Caneles usually slide correct out of their molds, but if they don't, turn the mold upside downward and knock on a hard surface, such equally a cutting board.
-
Let absurd for 2 hours at room temperature. Caneles must be eaten on the solar day they are baked.
July ii, 2016
60 g bees wax and 90 g butter is enough to coat 20 2-inch canele molds, with just a little flake left over. You lot could probably exercise 22-24 molds with that amount. This time around, I heated canele molds in the oven and left them exterior besides long while I was shaving bees wax so microwaving it with the butter.
When pouring hot wax/butter mixture the molds were just warm to touch. I microwaved the shaved wax and the diced butter together on the highest ability for 1 minute and 45 seconds, until I noticed it started to eddy. Working quickly, I coated all 20 molds with a nice, even layer. Surprisingly, the temperature was but perfect to requite a nice layer of wax.
Before, I would sometimes become too sparse a layer, considering the molds were pre-heated too hot. So, heat your molds until warm to touch, rut wax/butter until starting time signs of boiling. Piece of work quickly to cascade the hot mix into molds all the way to the top, pour out, then plough over onto a rack to remove excess wax. For the sake of efficiency, I pour the wax into the next mold every bit I go, not dorsum to the container, and top up with the mix from the container as needed.
Calories: 164 kcal | Carbohydrates: 19 1000 | Protein: 2 thou | Fat: seven g | Saturated Fat: 4 thou | Cholesterol: 62 mg | Sodium: 71 mg | Potassium: 57 mg | Fiber: 0 g | Saccharide: 14 chiliad | Vitamin A: 285 IU | Calcium: 44 mg | Iron: 0.5 mg
Updated on March 19, 2019
Source: https://tasteofartisan.com/canele/
0 Response to "Is Art Paste Supposed to Have Lumps in It"
Post a Comment